Floppy Drive Synthesizer
In a Nutshell: This was the first of several projects I took on over the course of the 2020 lockdown. I worked on it for about two months, building it mostly out of computer junk I found for free on Facebook Marketplace. In short, the final product is an 8-channel MIDI synthesizer. It receives MIDI commands from a computer through a serial bridge, and uses a trio of microcontrollers to govern note intervals. Most arrangements need to be customized in order to make best use of the eight channels.
Gallery:
Why Floppy Drives?
- If you've ever interacted with a machine that uses a floppy drive, you know sometimes when the computer reads from the disk, it will make a kind of harmonic buzzing sound. This is because the read head of the floppy drive indexes through positions along the radius of the disk in discrete increments, and it can do this fast enough to generate a tone.
This type of movement is facilitated by a stepper motor, which is a special motor that moves and stops in "steps" as opposed to spinning freely when energized. Stepper motors in general are pretty good for making music because the frequency of these steps can be tightly controlled and thus tuned to play notes. The downside of stepper motors is that they are complicated to control. Standard NEMA steppers use four wires and require a special circuit to convert simple commands like "step clockwise" into sequential phase changes which actually move the rotor. Additionally, as far as music goes, stepper motors unfortunately tend to be quite quiet because noise is an undesirable factor in most applications for which they are designed. I should also mention that even the little ones can get pretty expensive.
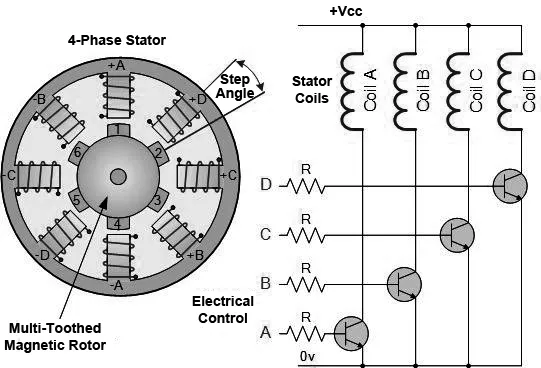
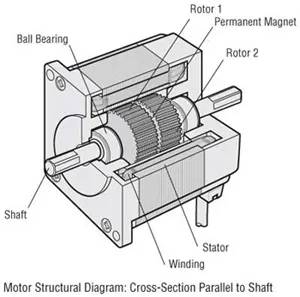
Floppy drives fix all these problems. Every drive has a stepper control circuit baked right into it, so the action of the motor can be controlled with two easy inputs: Step and Direction. While the stepper in each floppy drive is pretty tiny, they are proportionally LOUD AS HELL because of all the moving parts jiggling around inside the casing. This also gives the sound some nice crunchy texture, as opposed to the sterile square wave of a naked motor. Finally, in the Year of our Lord 2020, floppy drives are basically free. It's perfect.

Programming:
The first step is getting a microcontroller to play a single note on a single floppy drive, which is simple but not super simple. The moving head inside the drive cannot travel continuously in one direction, as eventually it will crash into the end of the screw driving it (causing a horrible sound). Therefore, the software moving the drive needs to keep track of where that head is so it can reverse direction (using the Direction control pin) when it reaches the end of its span. We can also optimize a little by determining which direction has more distance left whenever we begin playing a note, and move that way. The sound of the drive does change slightly depending on whether it is moving forward or in reverse, so the more we can minimize mid-note reversals, the better. This aspect inherently makes the system better at playing staccato notes as opposed to sustained ones. [NOTE: Add audio clips comparing Axel-F theme with Moonlight Shanty]
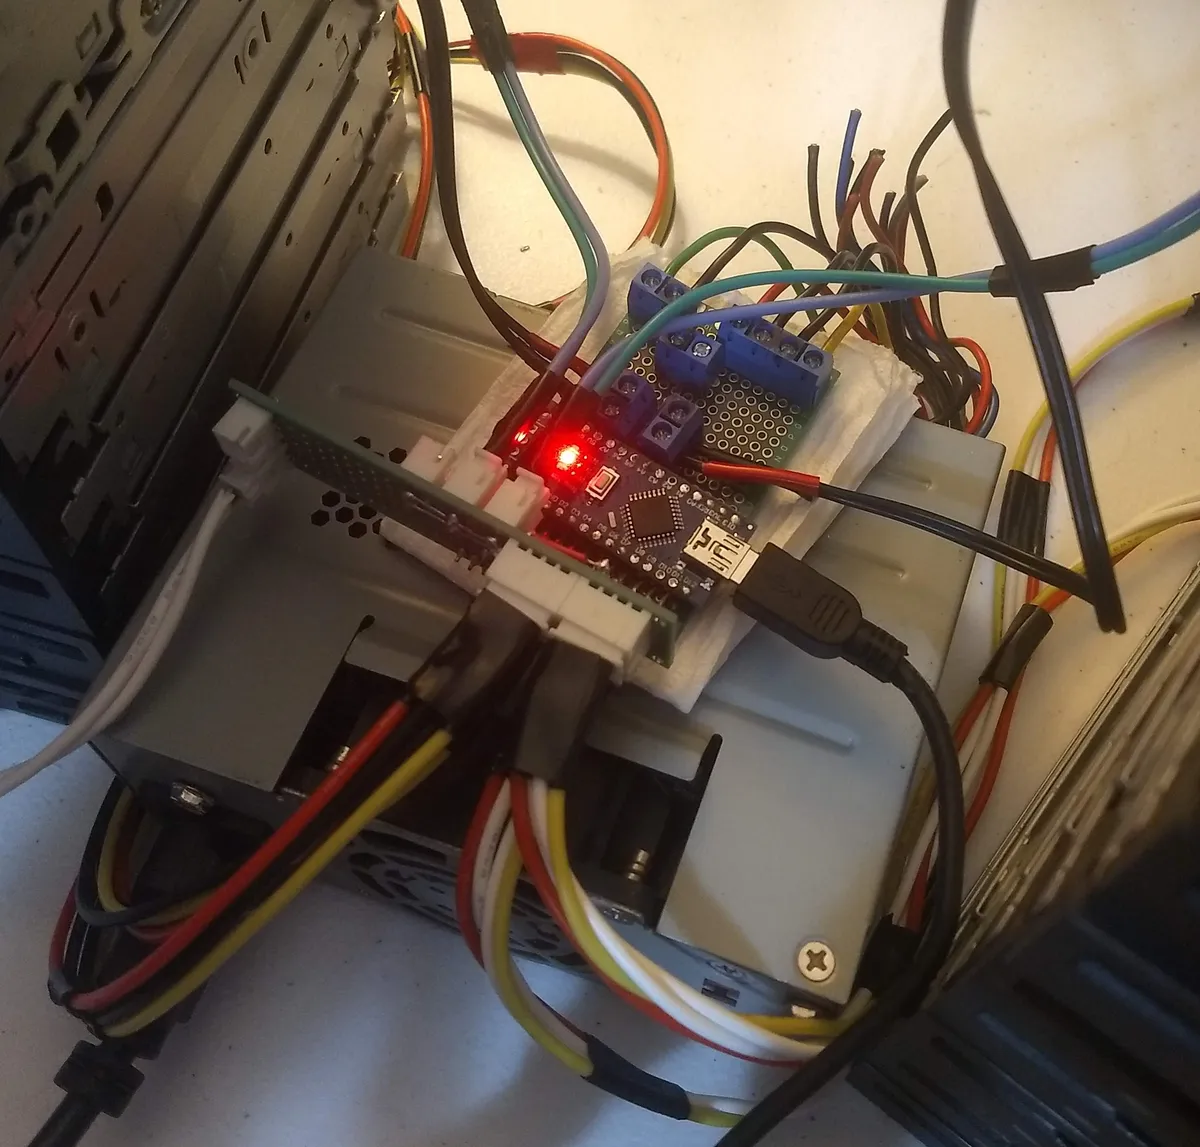
Then, there is the issue of timing. To play a note with precision using an Arduino-style microcontroller, we need to use a hardware timer to control the delay between steps, and ideally we need a separate timer for each distinct note we want to be able to play at once. Different Arduinos have different numbers of these timer components, but the Arduino Mega has the most (four), and it also conveniently has the most digital pinouts (which will come in handy later). With this arrangement, I can play four separate notes on four drives at the same time with one microcontroller.
In script, I have an object called Drive which represents an individual floppy drive. This object keeps track of the directionality and position of the drive head, as well as the pin numbers for controlling it. Drive objects are bundled into a DriveBank object in sets of four. These DriveBanks each represent a Timer because they can only play one note, however they can be sent messages to turn off certain percentages of their constituent drives in order to approximate volume control. This can be done because each drive has a shutdown pin which responds to a digital signal, and we have more than enough digital I/O pins to hook up each drive separately. On top of my control hierarchy is the Channel object, which can be configured to use a variable number of DriveBanks. The more banks a channel is assigned, the more granular its volume control can get, up to a resolution of 17 (one position for OFF and then one for each drive in the cluster). This higher volume resolution comes at the cost of fewer channels running on the node, and I found that having more channels to work with was almost always preferable to having better volume resolution. Here's my code.
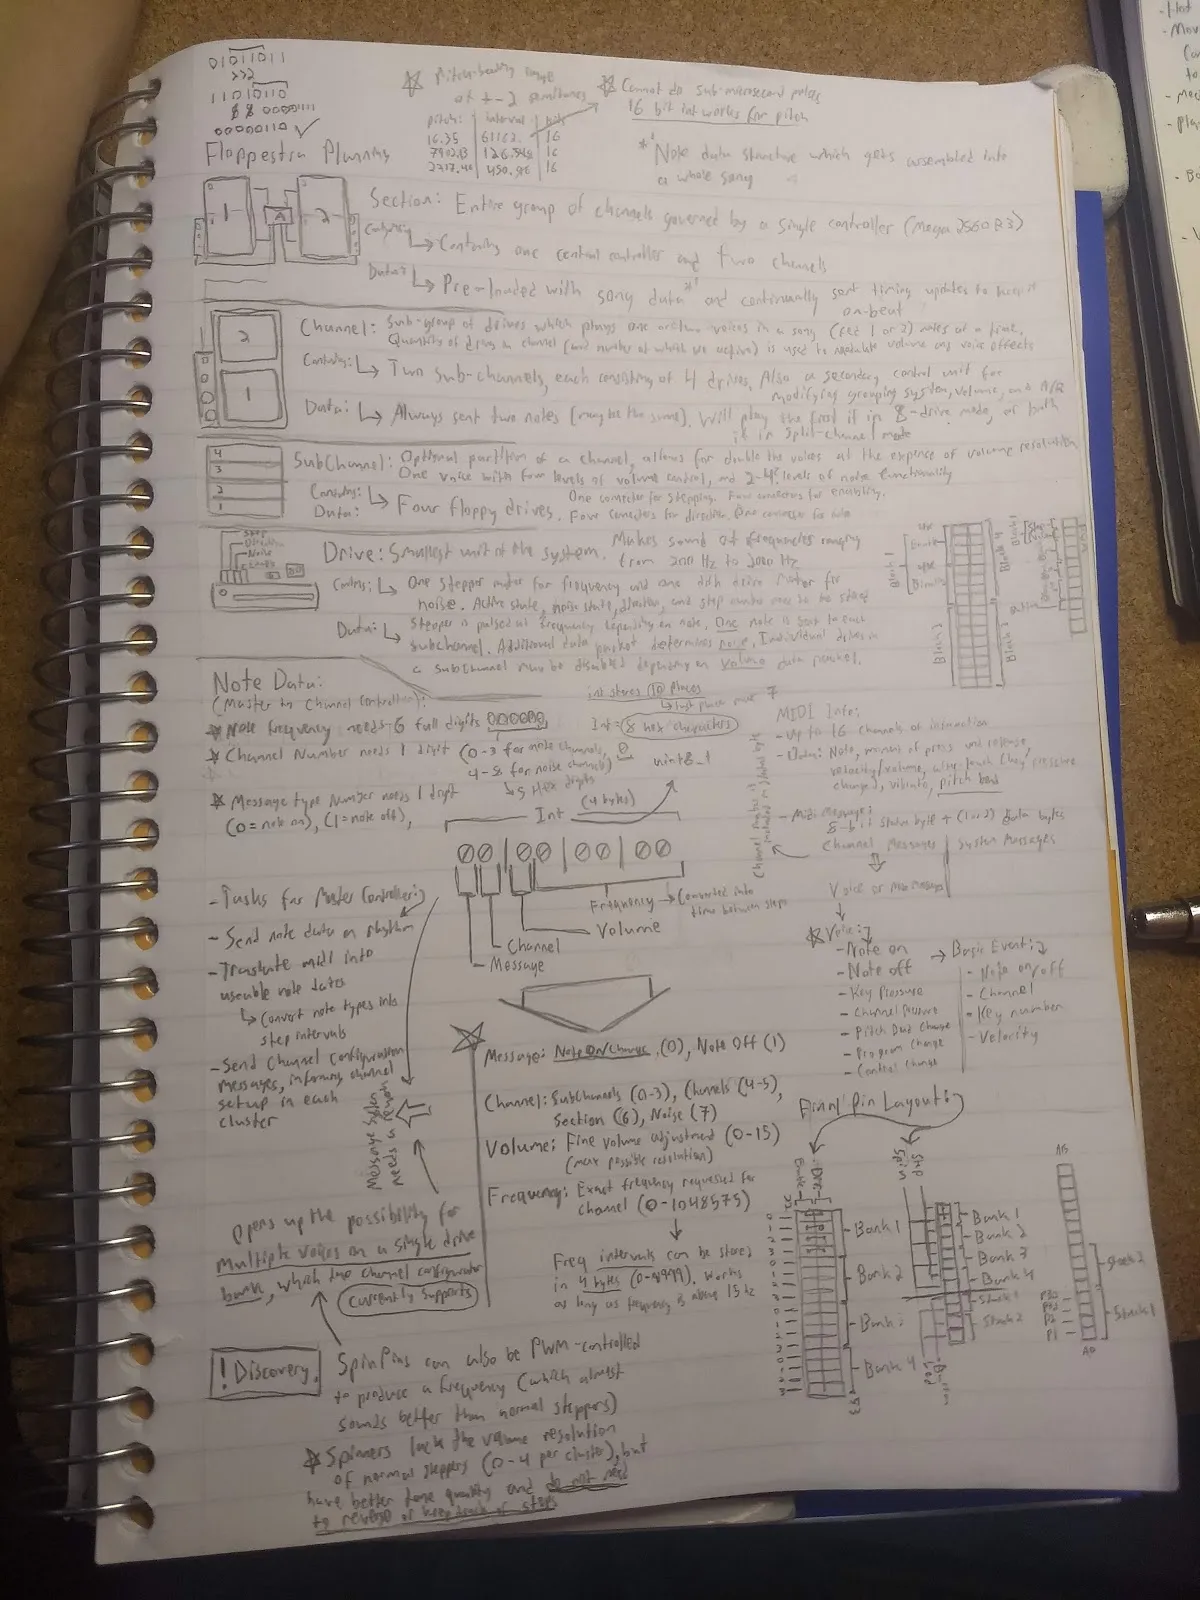
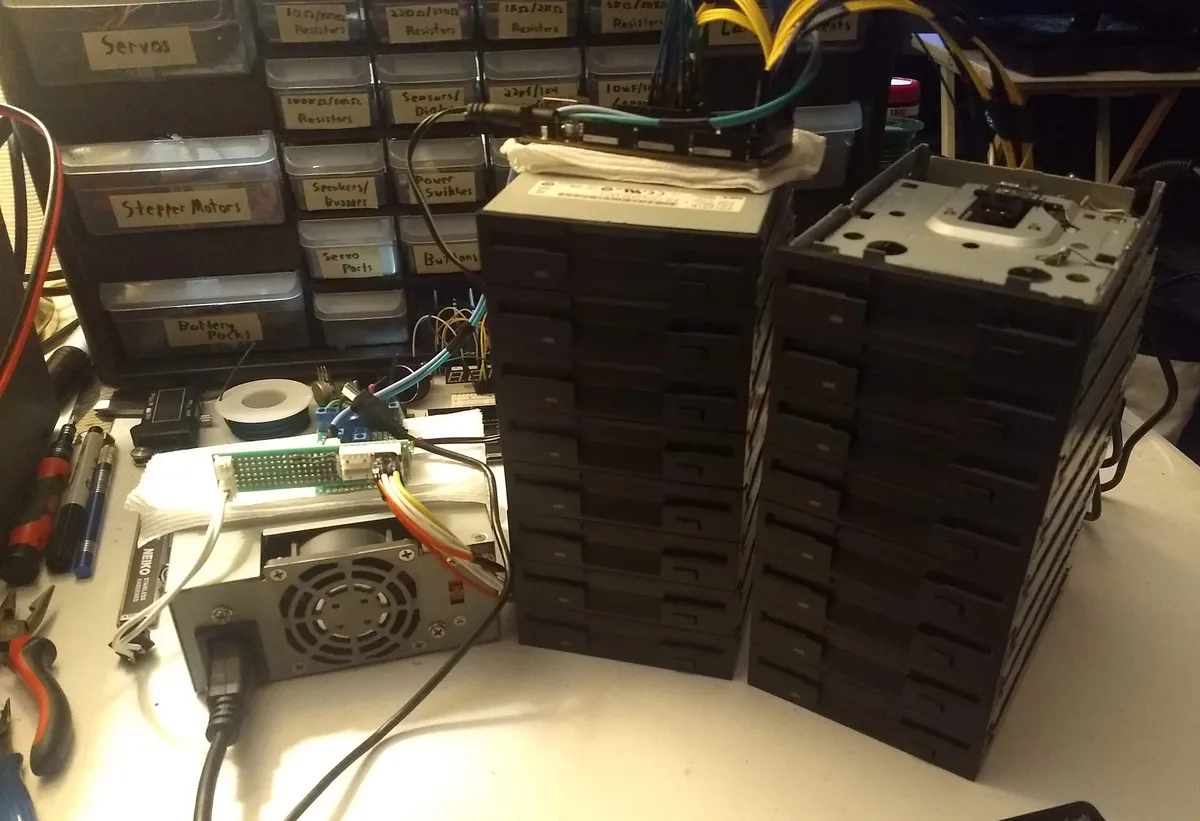
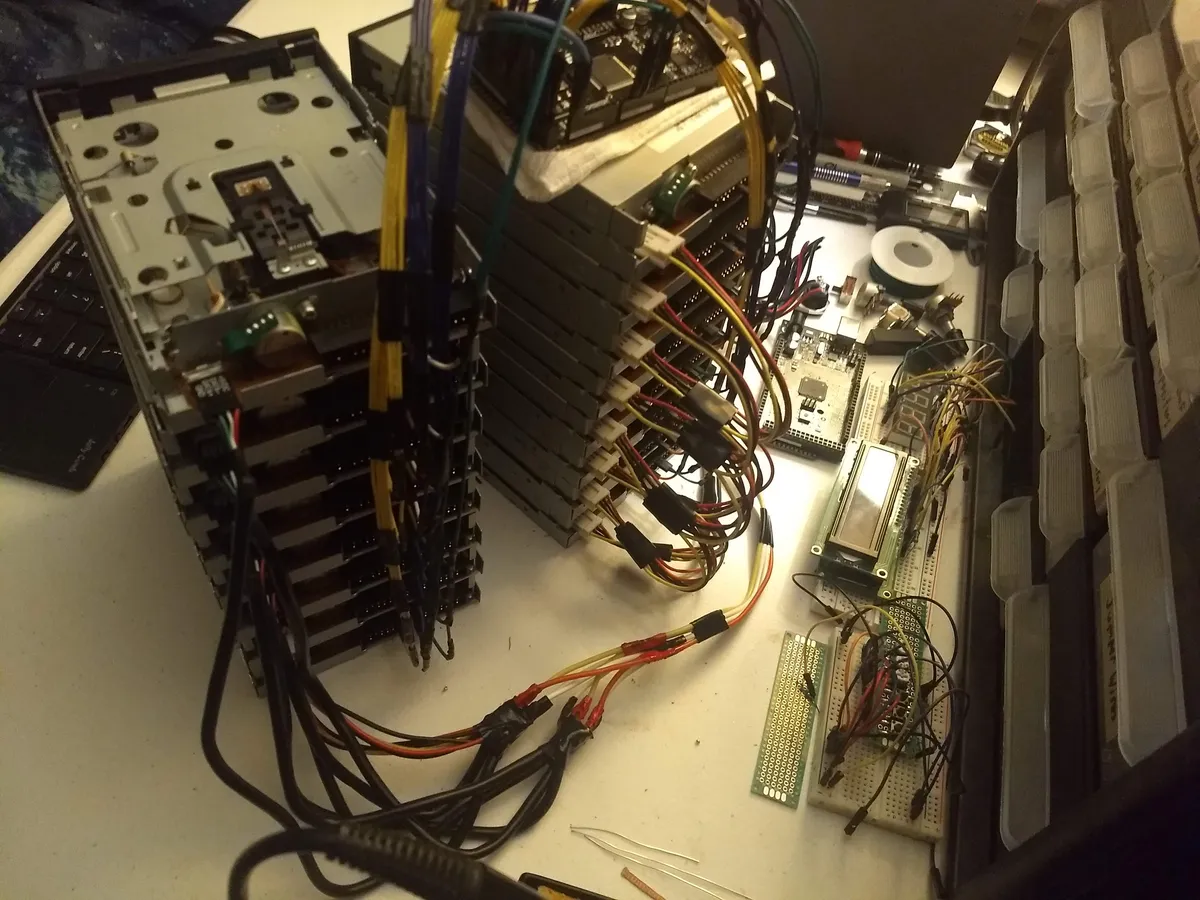
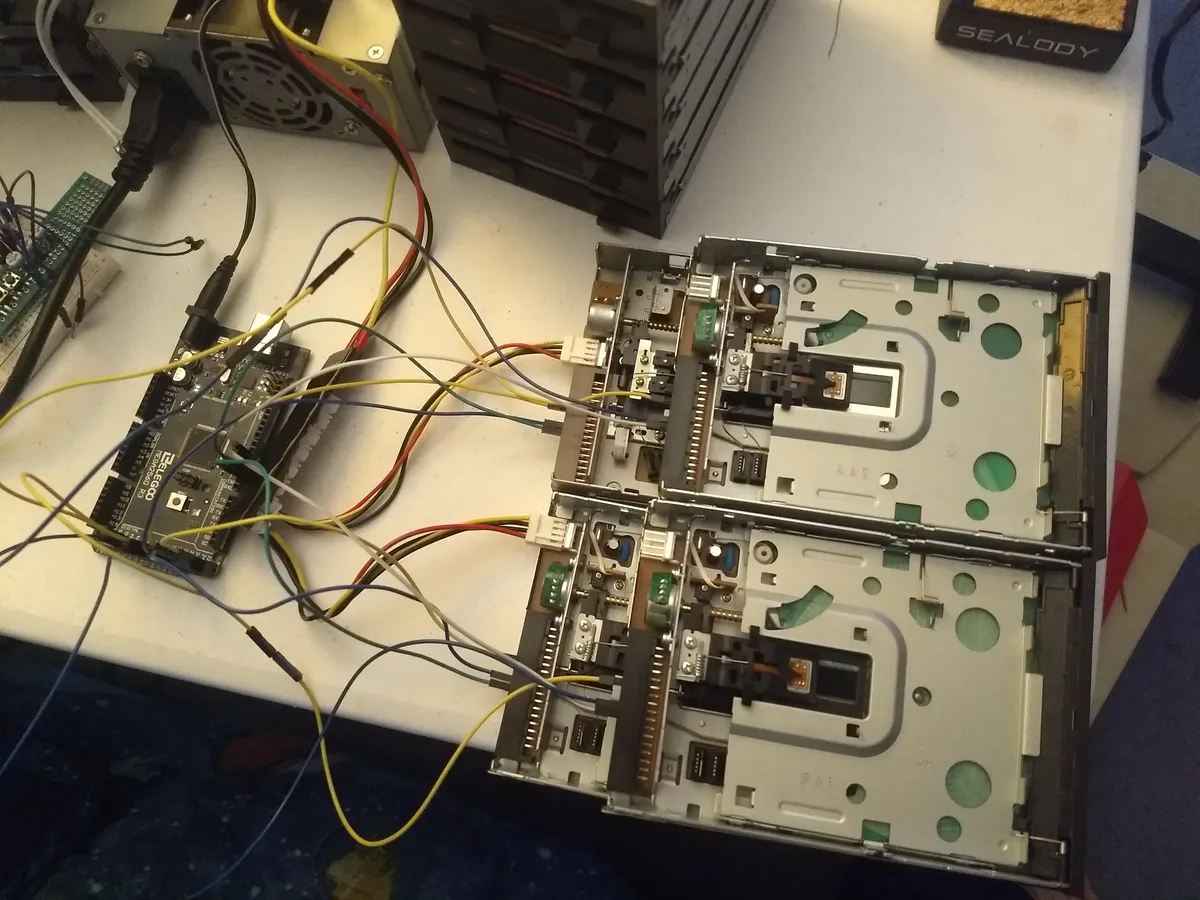
The system as described is great for controlling 16 drives, however I had about 40 lying around and wanted to use as many as possible. My solution was to make a twin array with a second Arduino Mega running identical code, then control the two of them from a single master Arduino Nano using a shared I2C bus. This master node processes MIDI data sent from a laptop over USB, determines which cluster contains the target channel, then sends it a message using a custom data protocol (described in my chickenscratch notes pictured above). MIDI is capable of sending all sorts of crazy data to electronic instruments, but the only commands my system really needs to work are NOTE ON, NOTE CHANGED, NOTE OFF, and CONFIGURE CHANNEL. Here's the script for the master node.
There is a bit of goofy Rube Goldberg software stuff involved in getting a computer to output midi commands to an Arduino via serial bus. In short, there needs to be a DAW (digital audio workstation) of some kind to originate the MIDI commands (I used Reaper because it's fully-featured and has a generous free trial period). No DAW I know of is able to natively output Arduino serial data, so instead it needs to connect to an application called loopMIDI, which creates a virtual MIDI port on the computer. LoopMIDI, in turn, needs to connect to an even MORE esoteric application called Hairless MIDI, which is pretty much expressly designed for doing exactly what I'm doing here. Hairless MIDI acts as a bridge which translates MIDI commands to Arduino-readable serial messages. We can see these MIDI commands making the complete journey in the video below.
Hardware Production:
- Power for the project is provided by a generic PSU I ripped out of some desktop computer, also acquired for free on FB Marketplace. I selected this PSU from a pile of a dozen others because it is the smallest and it has both 5V and 12V outputs, good for powering the three arduinos at 5V and the floppy clusters at 12V. I soldered a very simple perma-proto board together for receiving power from this unit and neatly distributing it, with plugs that could be easily disconnected for disassembly.
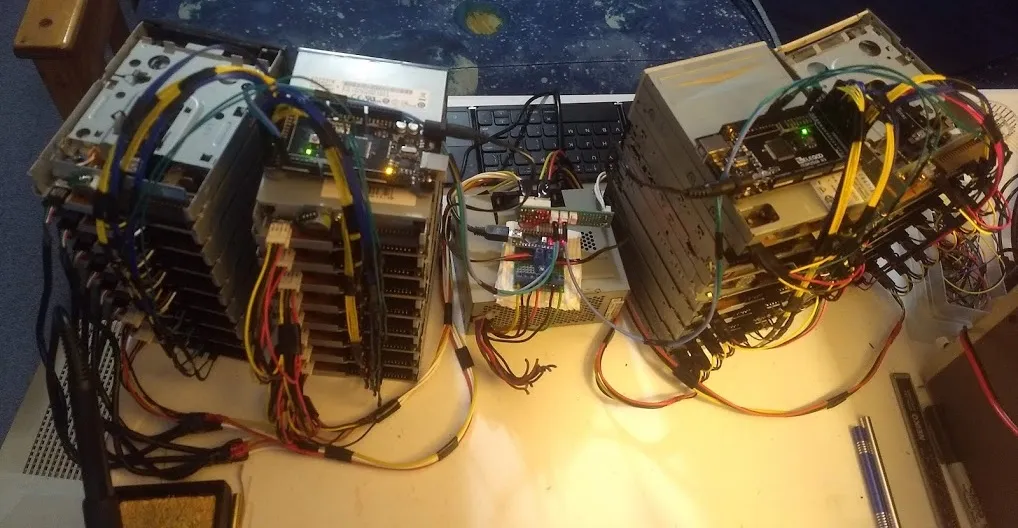
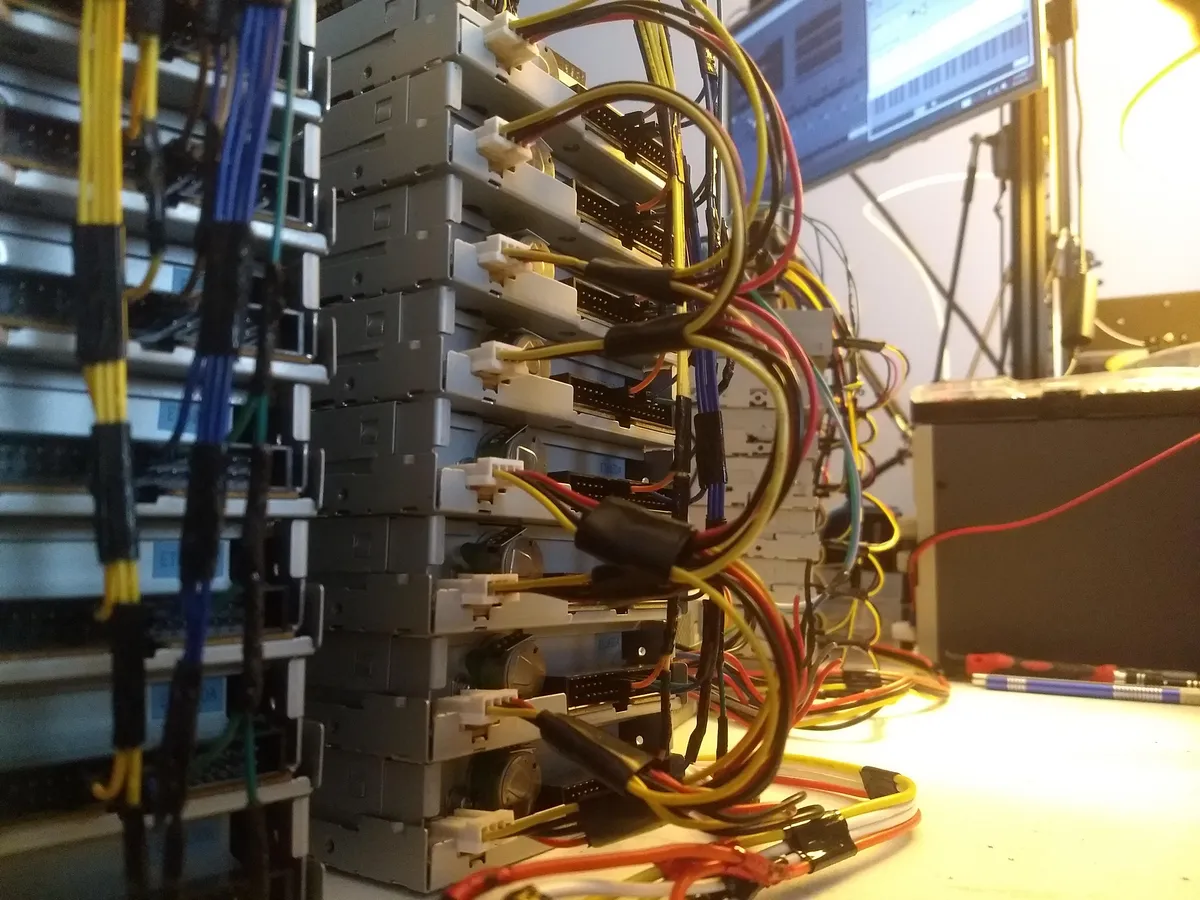
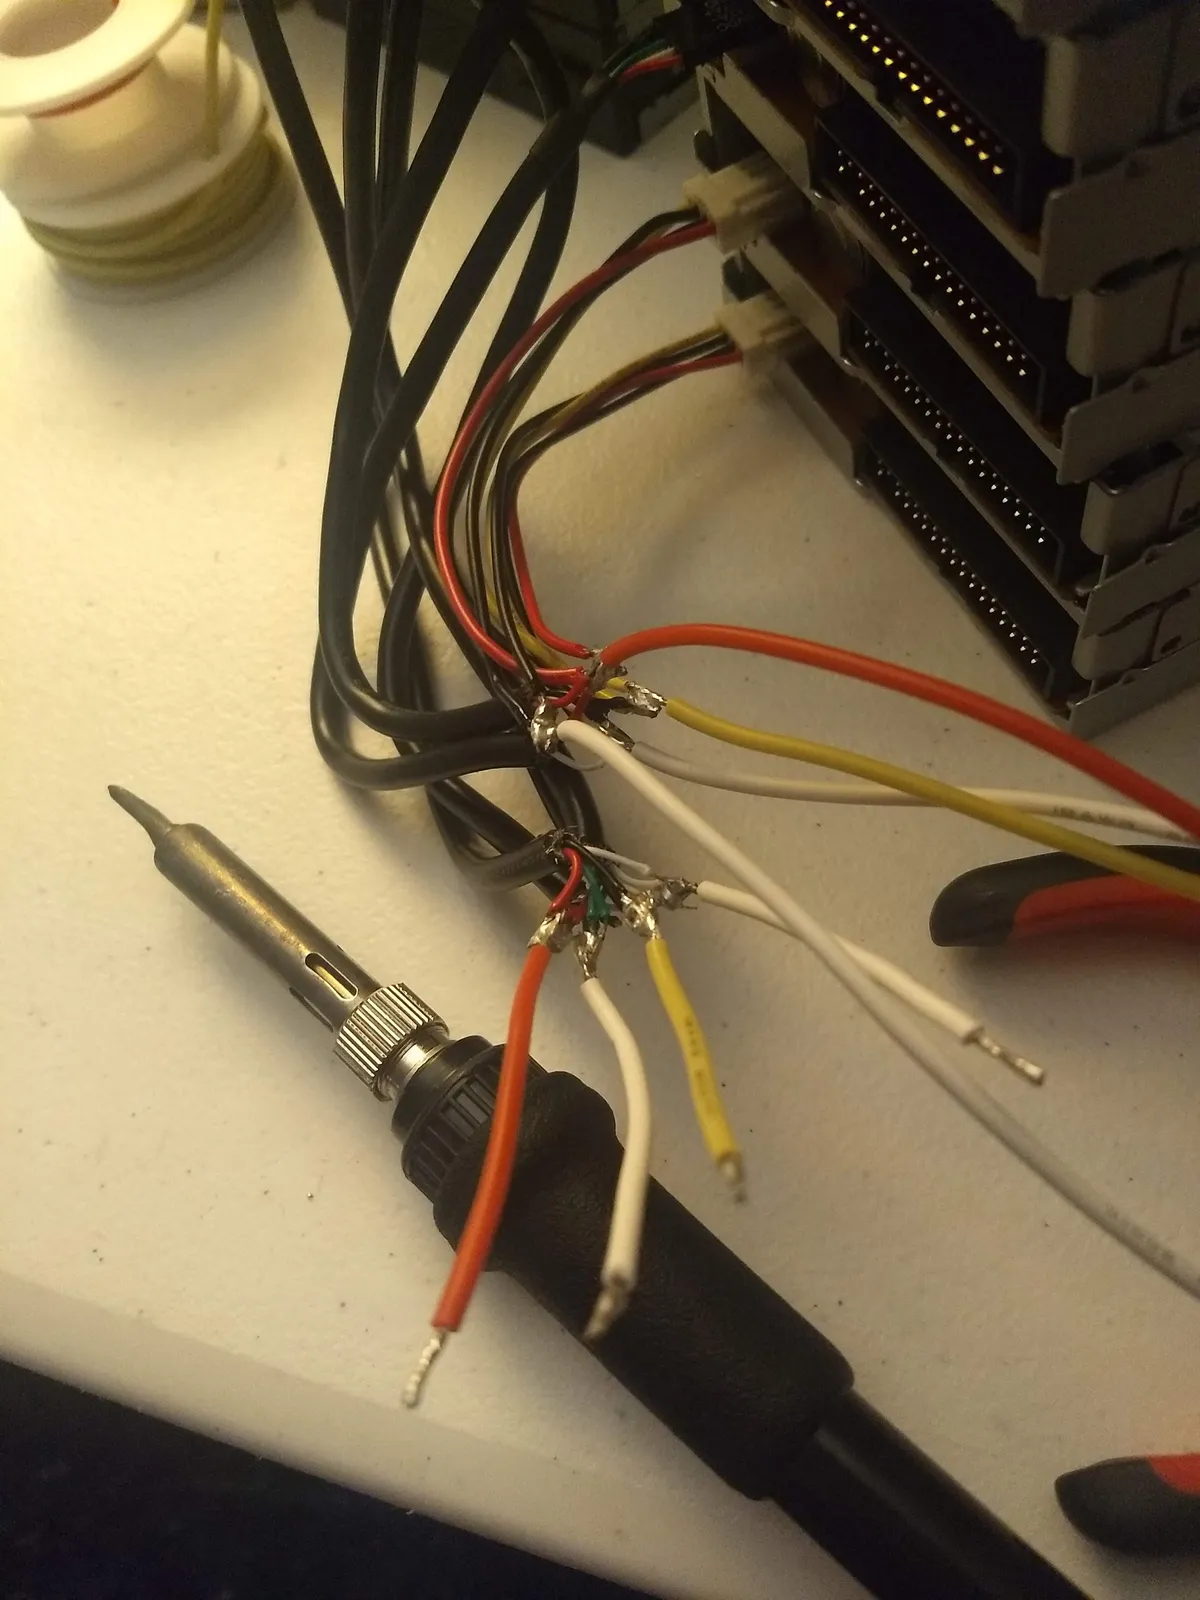
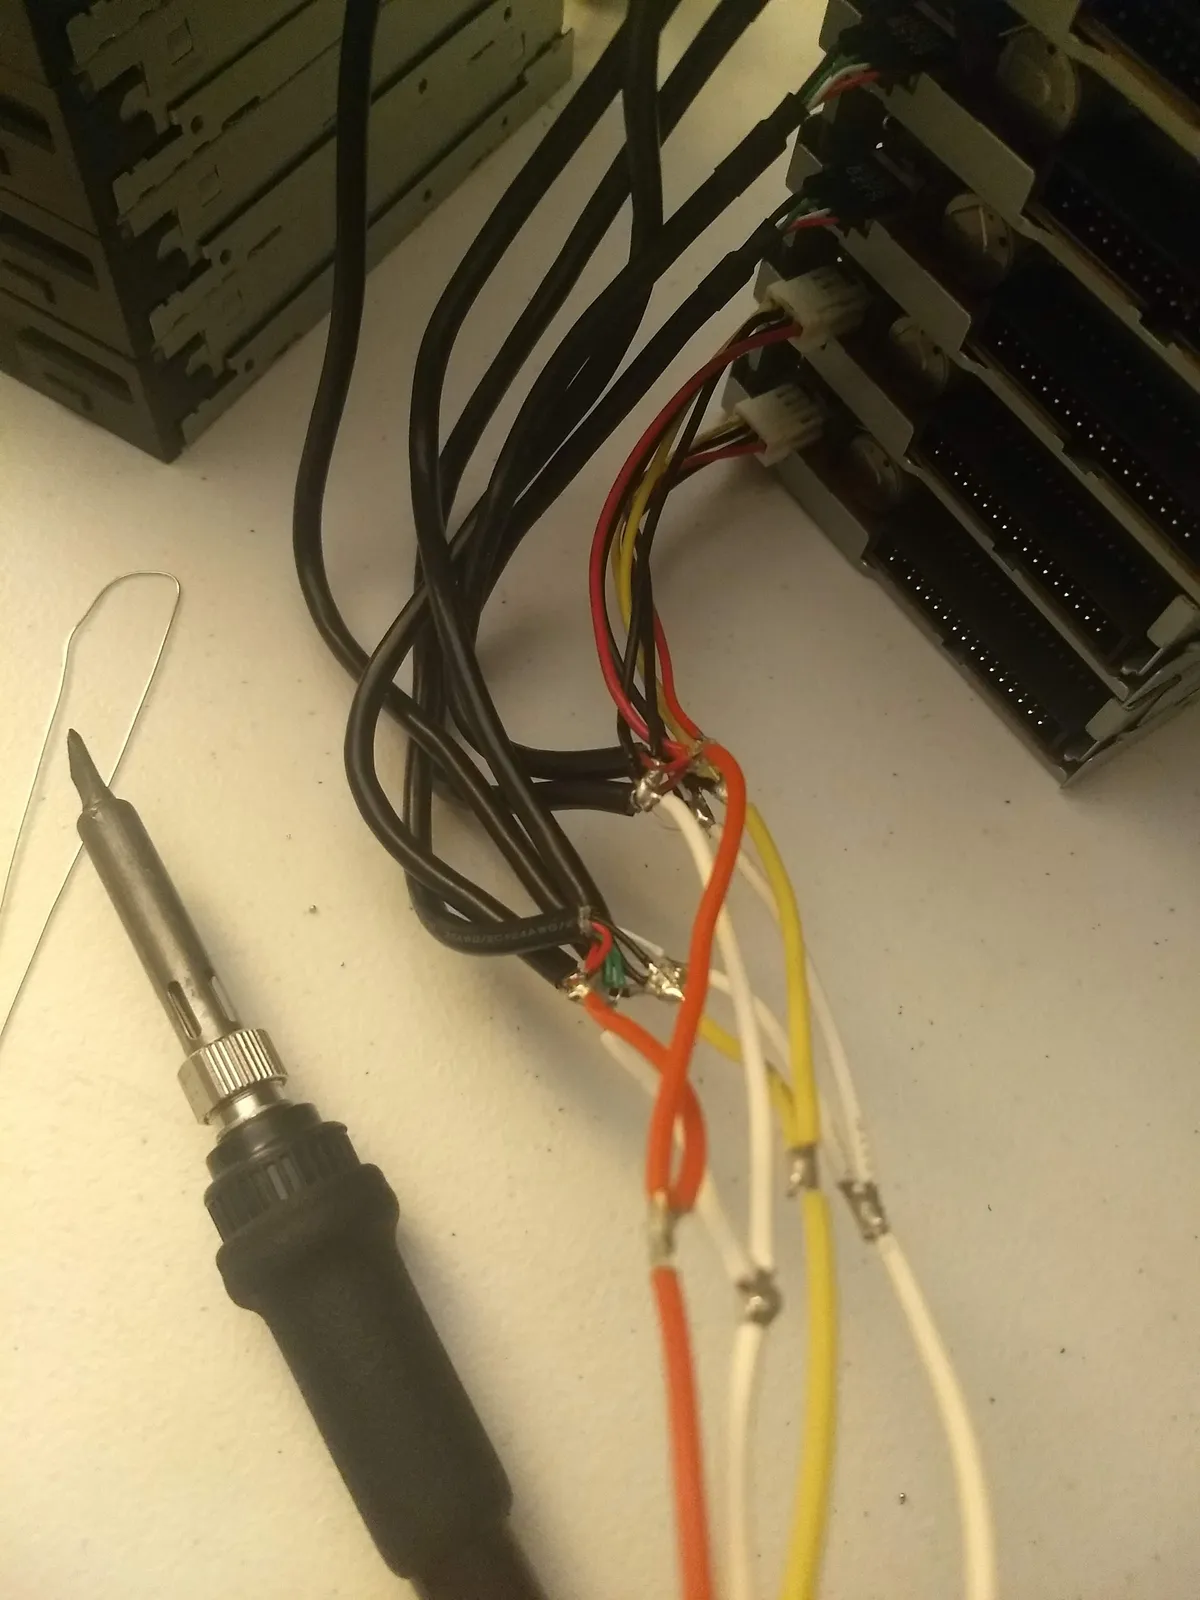
- Soldering this thing took over a month, and was a massive headache. Each drive needed 7 hookups in total, with 4 for power and 3 for control (that's 224 soldered connections in total for those of you keeping score). I used medium-gauge braided cables for power, daisy-chaining them in a jumping arc up each drive stack. For control I used thinner, solid core cables that I could mold into neat ribbons, which fit precisely into the microcontroller on top of the cluster. The control cables are color-coded with yellow for Shutdown, blue for Direction, and green for Step. Every drive needs a separate Shutdown and Direction cable (32 in total per cluster), however the Step cables are daisy-chained in groups of four, one per drivebank. Of course, many of the floppy drives are made by different brands and have ports in different places (or in different configurations entirely), complicating the process.
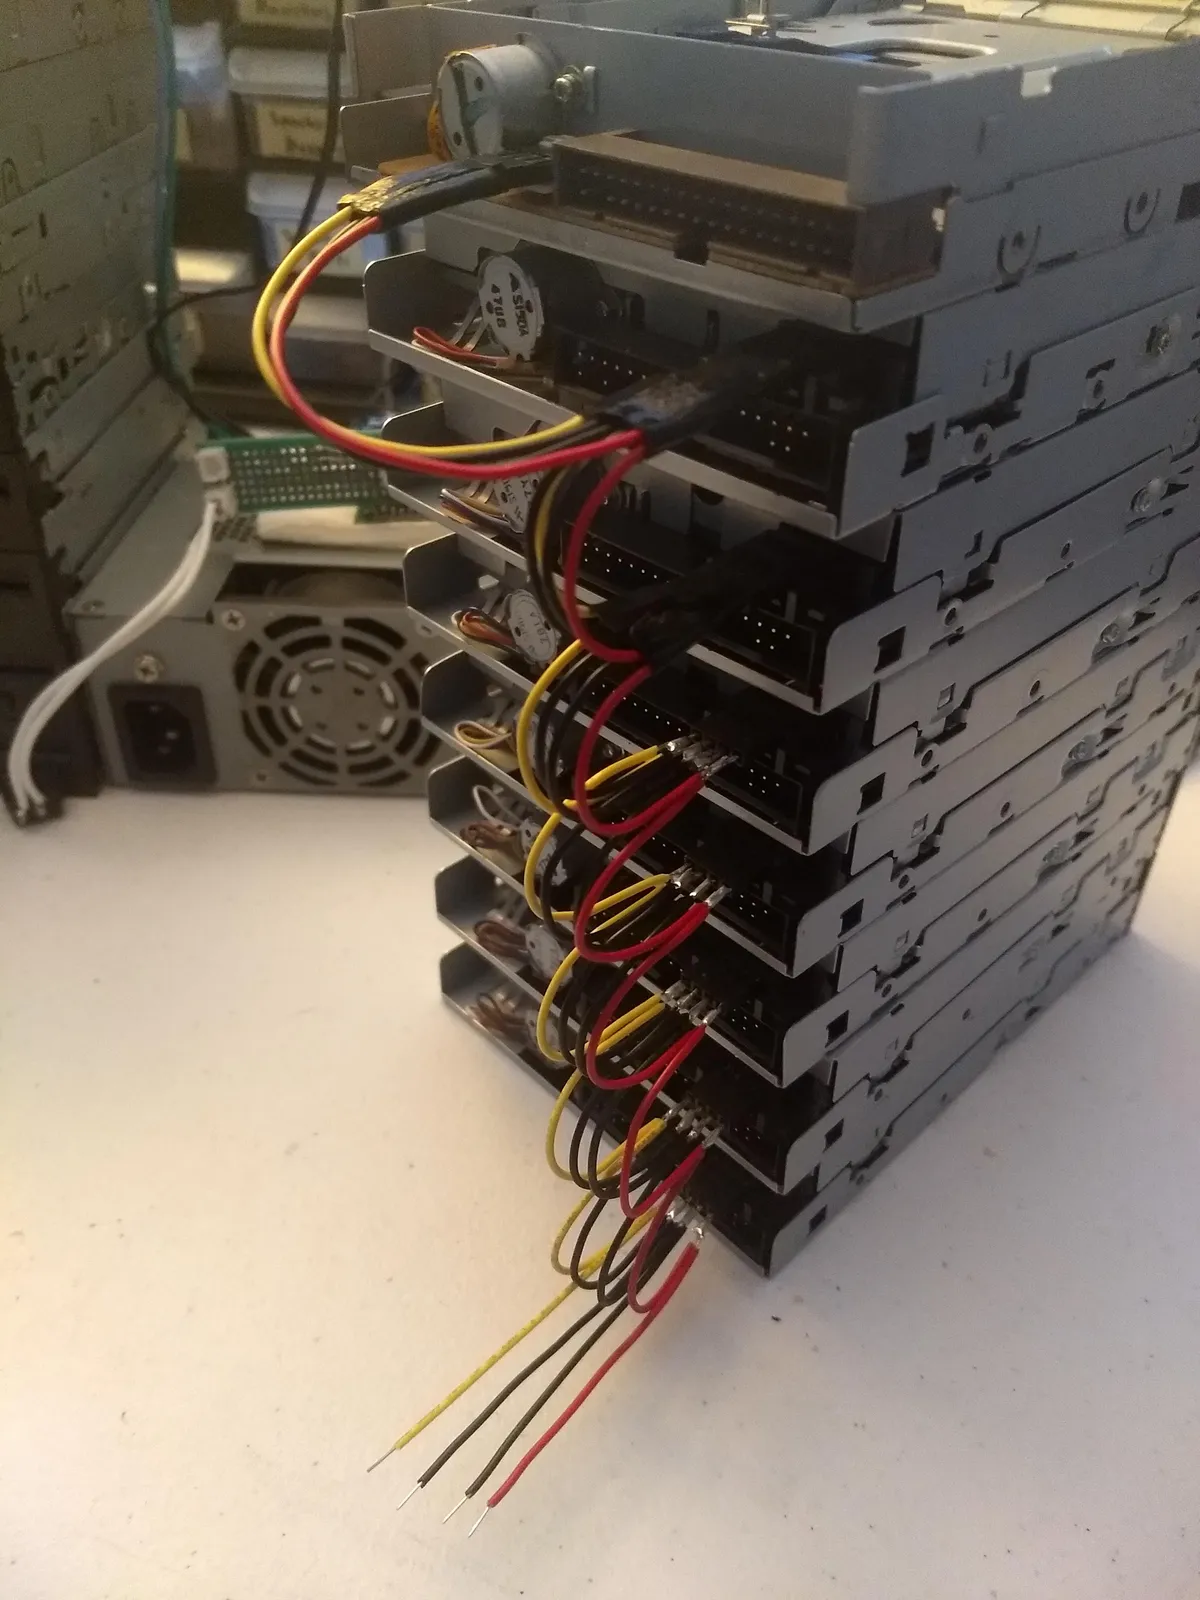
 A branched power cable bundle. All of these drives used special plugs for power, so I trimmed their female counterparts off of salvaged power supplies and joined them all into this lovecraftian monstrosity.
 Another in-progress power cable series. This one was the easiest because the power jacks on these floppies were simple male pin headers, same as the control pins.
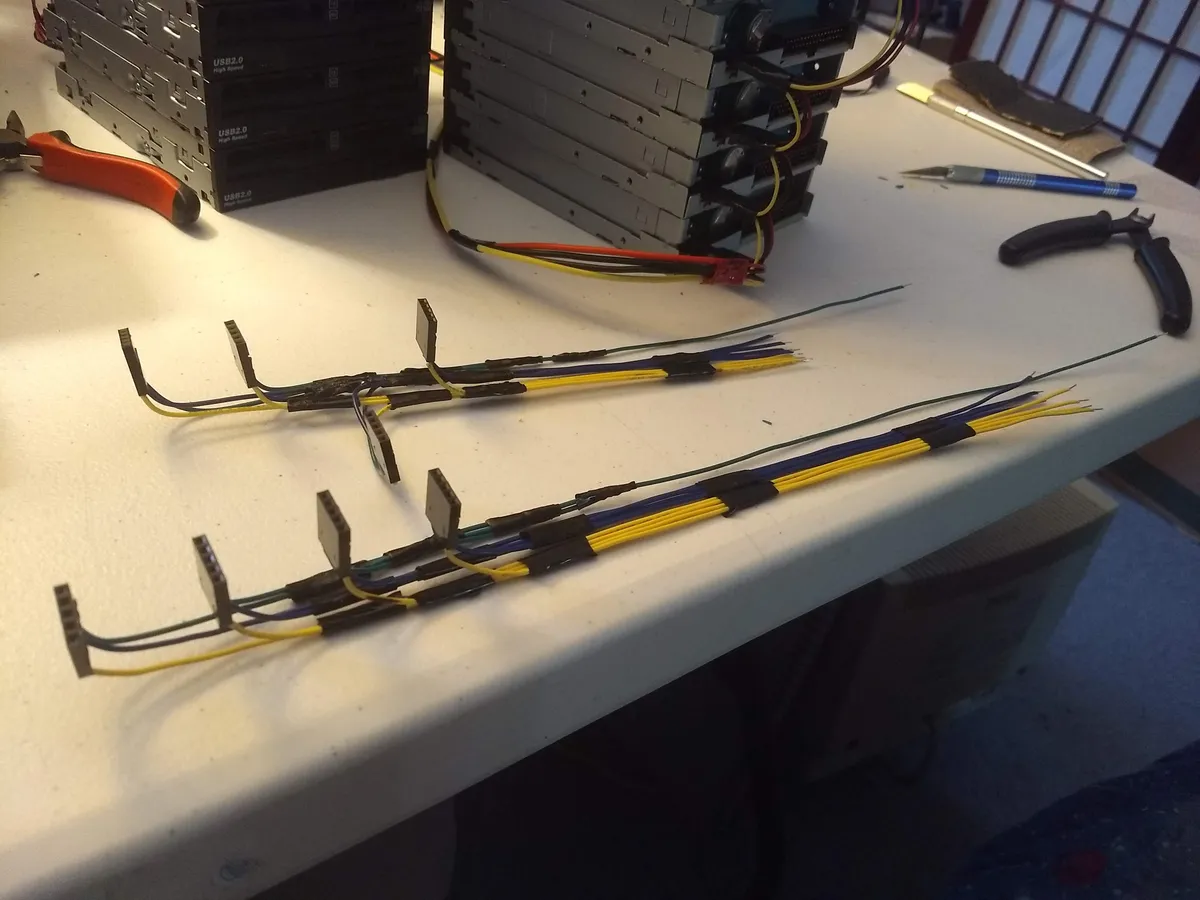 Two complete control cable bundles. You can see one header is offset for a different kind of drive. Why I put that one in the middle I have no idea.
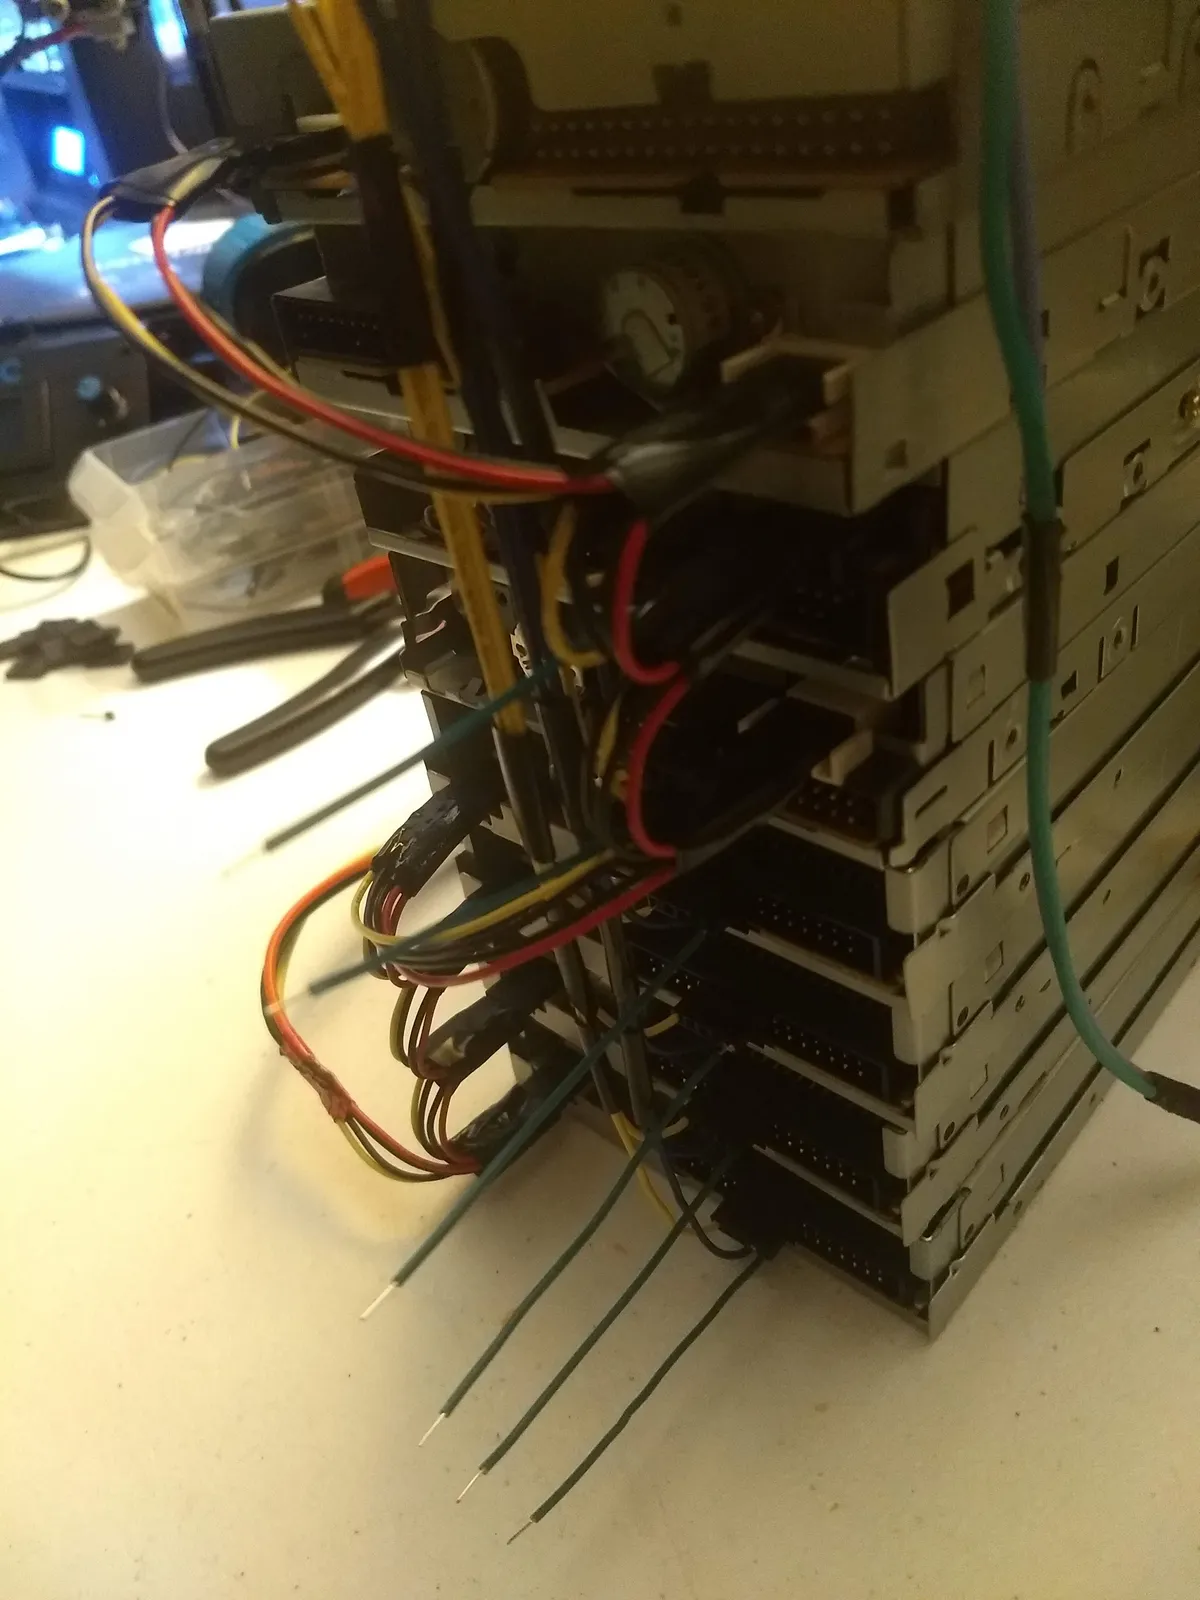 This is one where I had to zig-zag a little with my power cables. I think it's prettier than the others. You can also see the in-progress Step cables, sized out and stripped for soldering.
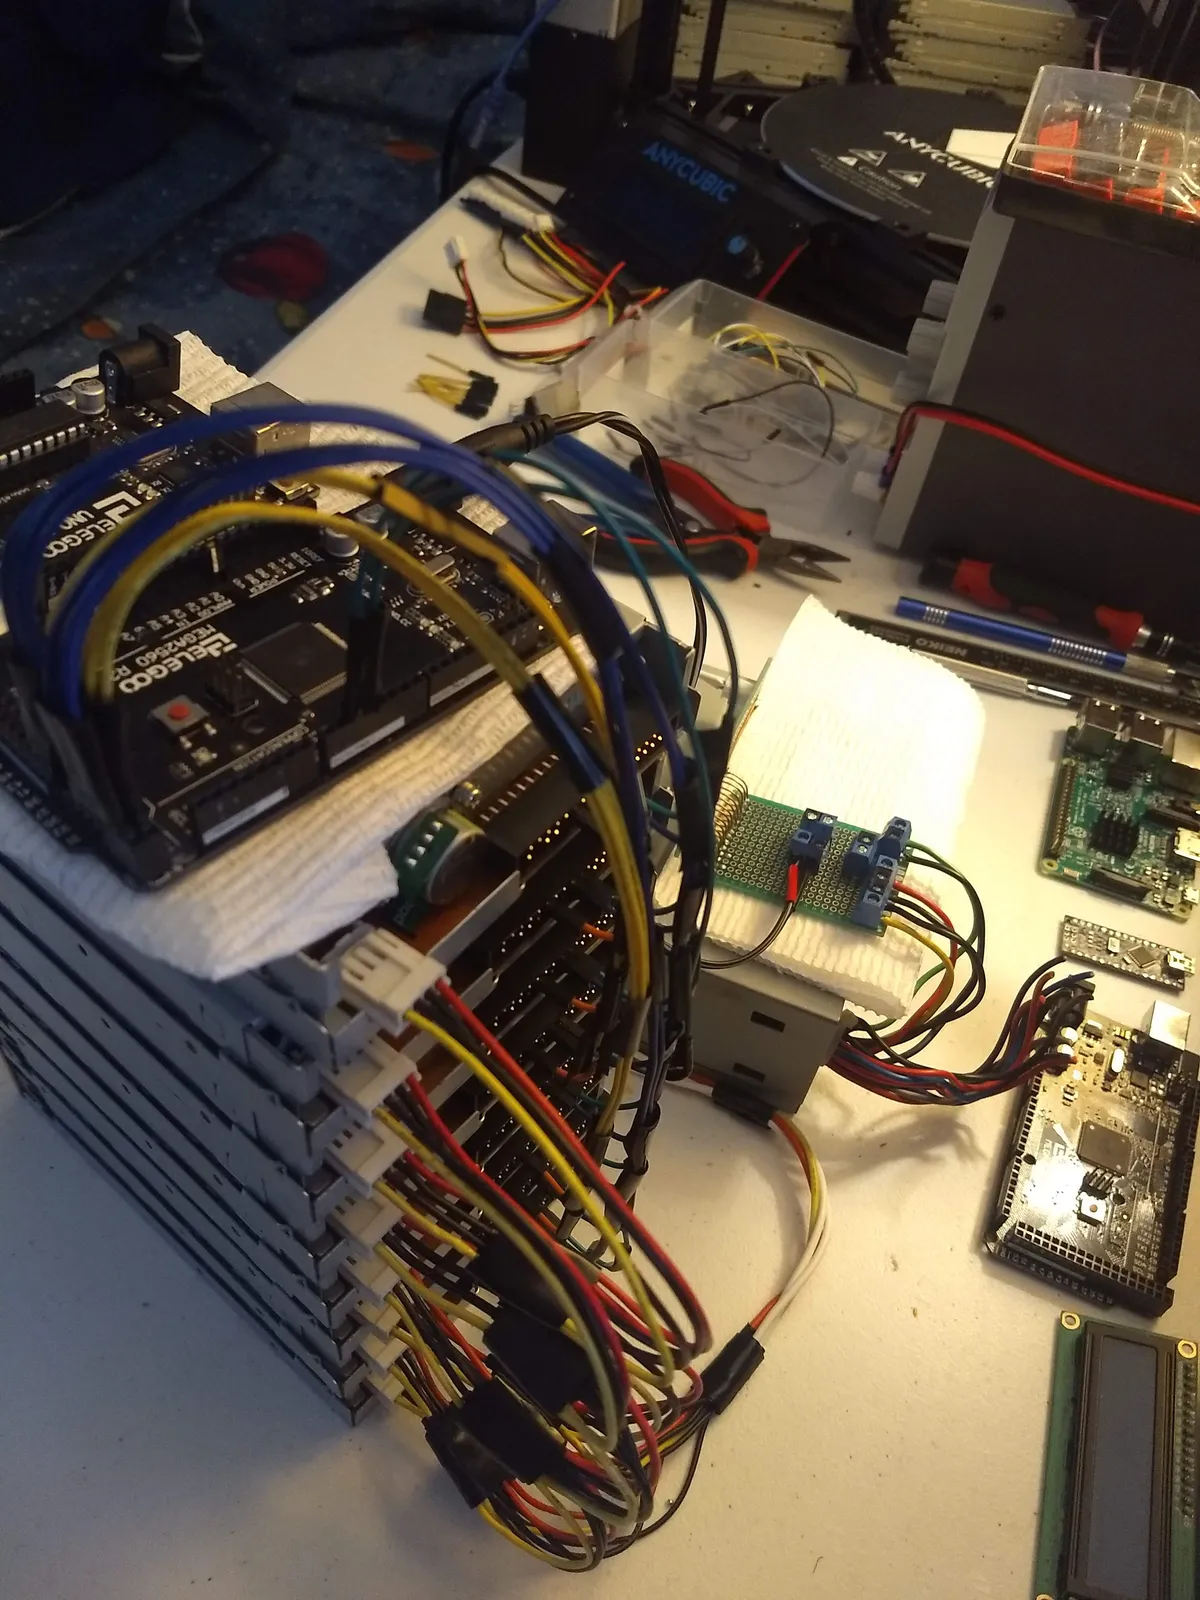 Here you can see where the control cables connect into the cluster controller, with each pin group separated by type. Also a nice and neat daisy-chained power bus.
Takeaways:
- This system has some really interesting limitations. Low notes are overwhelmingly louder and more resonant, while high notes sound nicer but are nearly unworkably quiet. It also only has a couple octaves of range before the sound just loses all harmonic qualities. I chewed through a lot of music before I found stuff that actually works well on it.
- The MIDI I was able to find that played well on the synth (i.e. Chocolate Rain, Shape of You, Axel F) still needed a ton of processing to play at all with the irregular channel arrangement and limited range capabilities. Ultimately, the coolest music you could play with this setup would have to be composed from scratch.
- In retrospect, some features that made this project much harder to build ended up being not that useful. The volume control by disabling discrete drives, for example, is not something I ended up using. Because volume scales logarithmically, it turned out that the four increments of volume control in each drivebank just didn't really make a difference. Also, while I really like how the trio of Arduinos work, it is likely I could have gotten a better result with one, more sophisticated non-Arduino board. I know some are made with as many as 16 timers, which could have made for a totally different instrument.
- I am not very precious about my projects once I've built them, however this one was particularly fragile and fell apart almost immediately in storage. Especially since the wiring is so tenuous and complicated, I would have a very hard time resuscitating it, which is regrettable. I should have built SOME sort of housing to keep it intact.